Mailchimp for Joomlab Form
This plugin enables integration with Mailchimp APIs for the Joomlab Form extension. After installation and activation, two menu "Mailchimp audiences" and "Mailchimp contacts" will be displayed under the Joomlab Forms from the mainmenu in the admin panel.
Once activated and successfully configured, go to MainMenu/System/Plugins find the "Mailchimp plugin for Joomlab Form" to configure the Mailchimp APIs key.
- API key *: Too find this key you can navigate to the API Keys section from your Mailchimp dashboard. Click Create New Key and give it a descriptive name that will remind you which application it’s used for. Copy the generated key immediately and store it in a secure location. You won’t be able to see or copy the key once you finish generating it.
- Server prefix *: To find the value for the server, log into your Mailchimp account and look at the URL in your browser. You’ll see something like. You’ll see something like https://us19.admin.mailchimp.com/; the us19 part is the server prefix.
To learn more about Mailchimp APIs, you can refer to this guide https://mailchimp.com/developer/marketing/guides/quick-start.
Mailchimp audiences:
From the main menu page, find the Joomlab Form component and click on the submenu "Mailchimp Audiences", which will take you to the audience management page. Here, you can sync existing audiences from your Mailchimp account to keep them in sync with local data, you need to create a new audience directly from your Joomla! website.
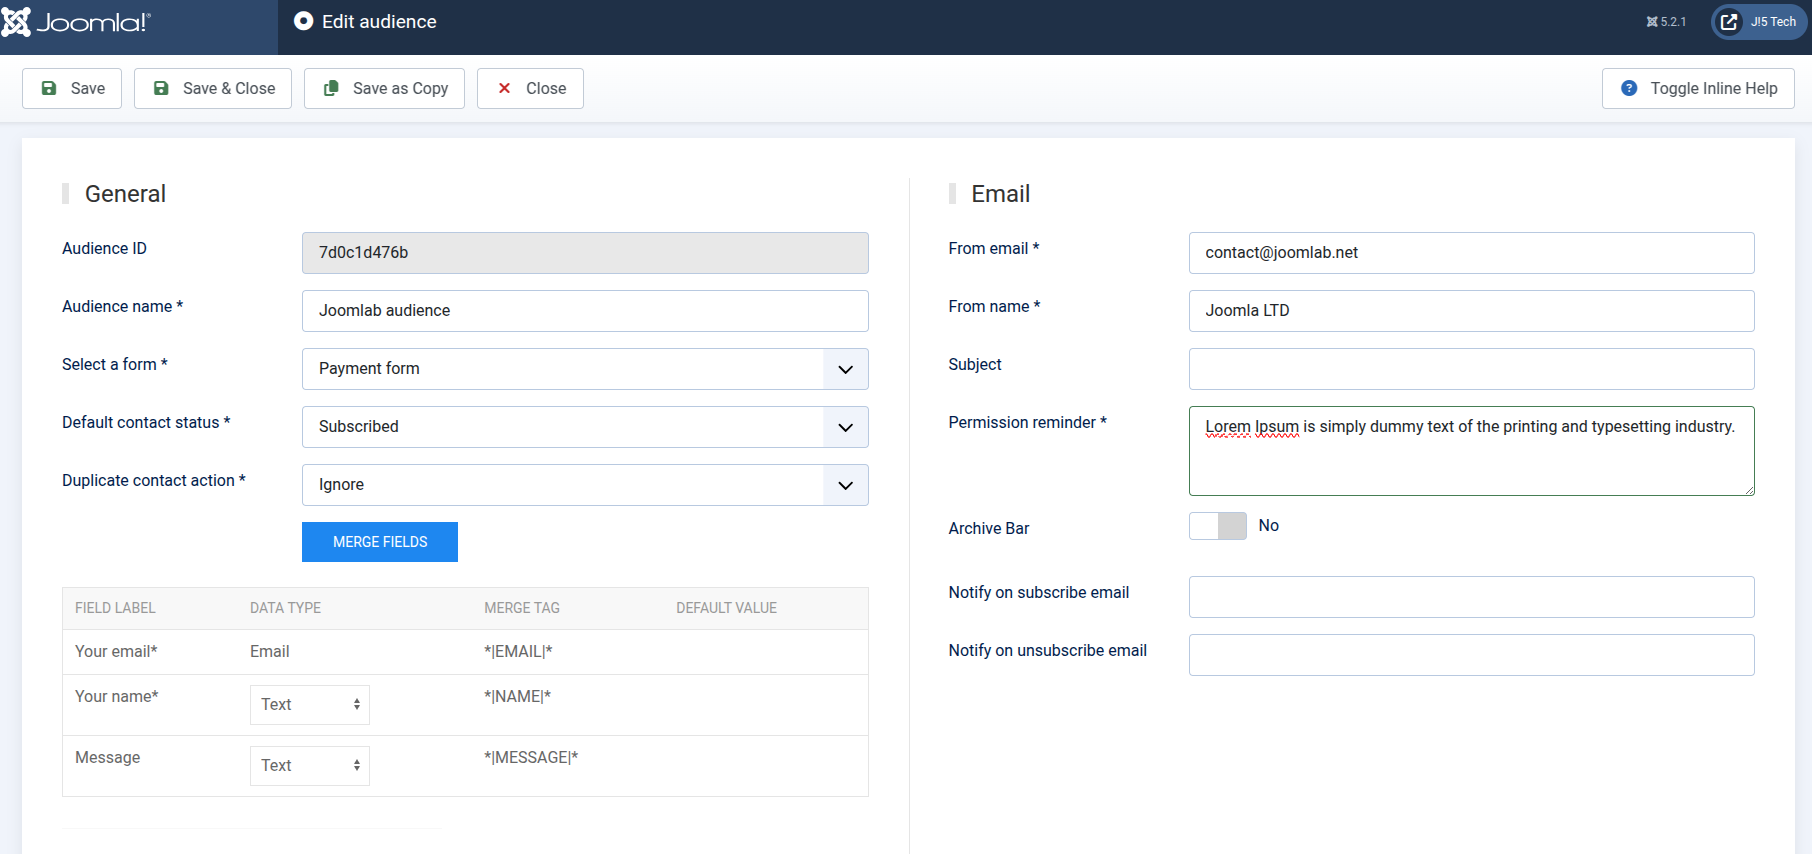
Click the NEW button from the toolbar to create a new audience. You will need to enter some required information. If you are already familiar with Mailchimp’s admin panel, you will notice that the information here is quite similar to Mailchimp.
One important option to note is "Duplicate Contact Action", which has two choices: "Update Data" and "Ignore". This means that if a user submits your form and their email has already been registered before, the system will detect the duplication.
- Selecting "Update Data" will update the user's information with the latest data.
- Selecting "Ignore" will do nothing, and the existing user data will remain unchanged.
You must also select a corresponding Joomlab Form. This means you need to have previously created a Joomlab Form that must contain at least one TEXT field formatted as an Email. This field serves as the primary email identifier for Mailchimp's customer records.
If there is more than one email field, the first email field will be used as the primary field, other fields will be mapped to user information accordingly. Once the Audience is successfully saved, a local dataset will be created, and at the same time, an equivalent audience will be created directly in your Mailchimp account. You can log into your Mailchimp account to see the latest updates.
During the saving process, the system will extract field information from Joomlab Form and automatically call the Mailchimp API to create Merge Fields without requiring manual setup in Mailchimp.
⚠️ Important Note: Since Merge Fields are automatically synchronized with Joomlab Form, you should avoid manually modifying existing field values from Mailchimp’s web interface. If there is any desynchronization, you should SAVE the audience again from your Joomla! website to re-sync the data correctly.
Mailchimp contacts:
From the main menu page, find the Joomlab Form component and click on the submenu "Mailchimp Contacts", which will take you to the contact management page.
A Contact represents the information of users who have submitted your form, and it corresponds directly to a contact in Mailchimp. The contact management page lists all registered users along with their details, allowing you to add, delete, or edit contacts directly. Any changes made here will also be synchronized in real time with Mailchimp, just like audiences.
As mentioned earlier, when you click the "Fetch Data" button for the first time from the Audience Management page, if you already have existing contacts in your Mailchimp account, they will automatically be imported and created in your Joomla! website as well.